Introduction
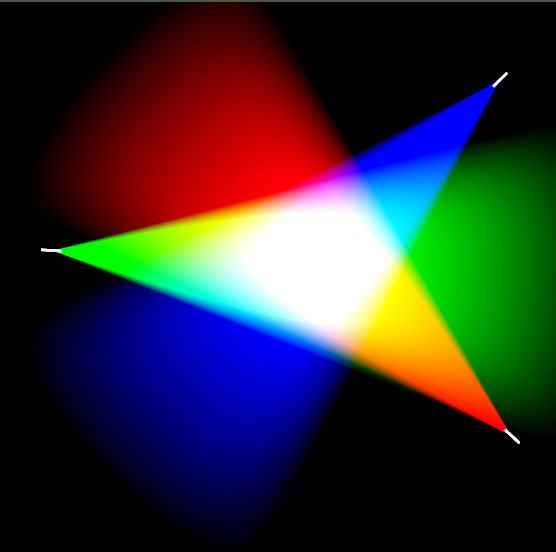
The aim of this post is to demonstrate a fun way of dot product visualization. And while doing that, I also want to demo the concept of how it looks when lights overlap using Shaders in Unity. By the end of this post, you should be able to whip up shaders that looks something like the picture below.
The visible conical areas originating from cuboid represent a “valid” region of the dot product as setup in the code, which can also be considered as “Field of View” regions. The conical angles and distance are exposed to the editor for tweaking.
If you wish to see a video of this, please checkout my Youtube video here.
Setting Up
To prepare for dot product visualization, as always, we will need to setup the scene and scripts. Let’s go over them sequentially:
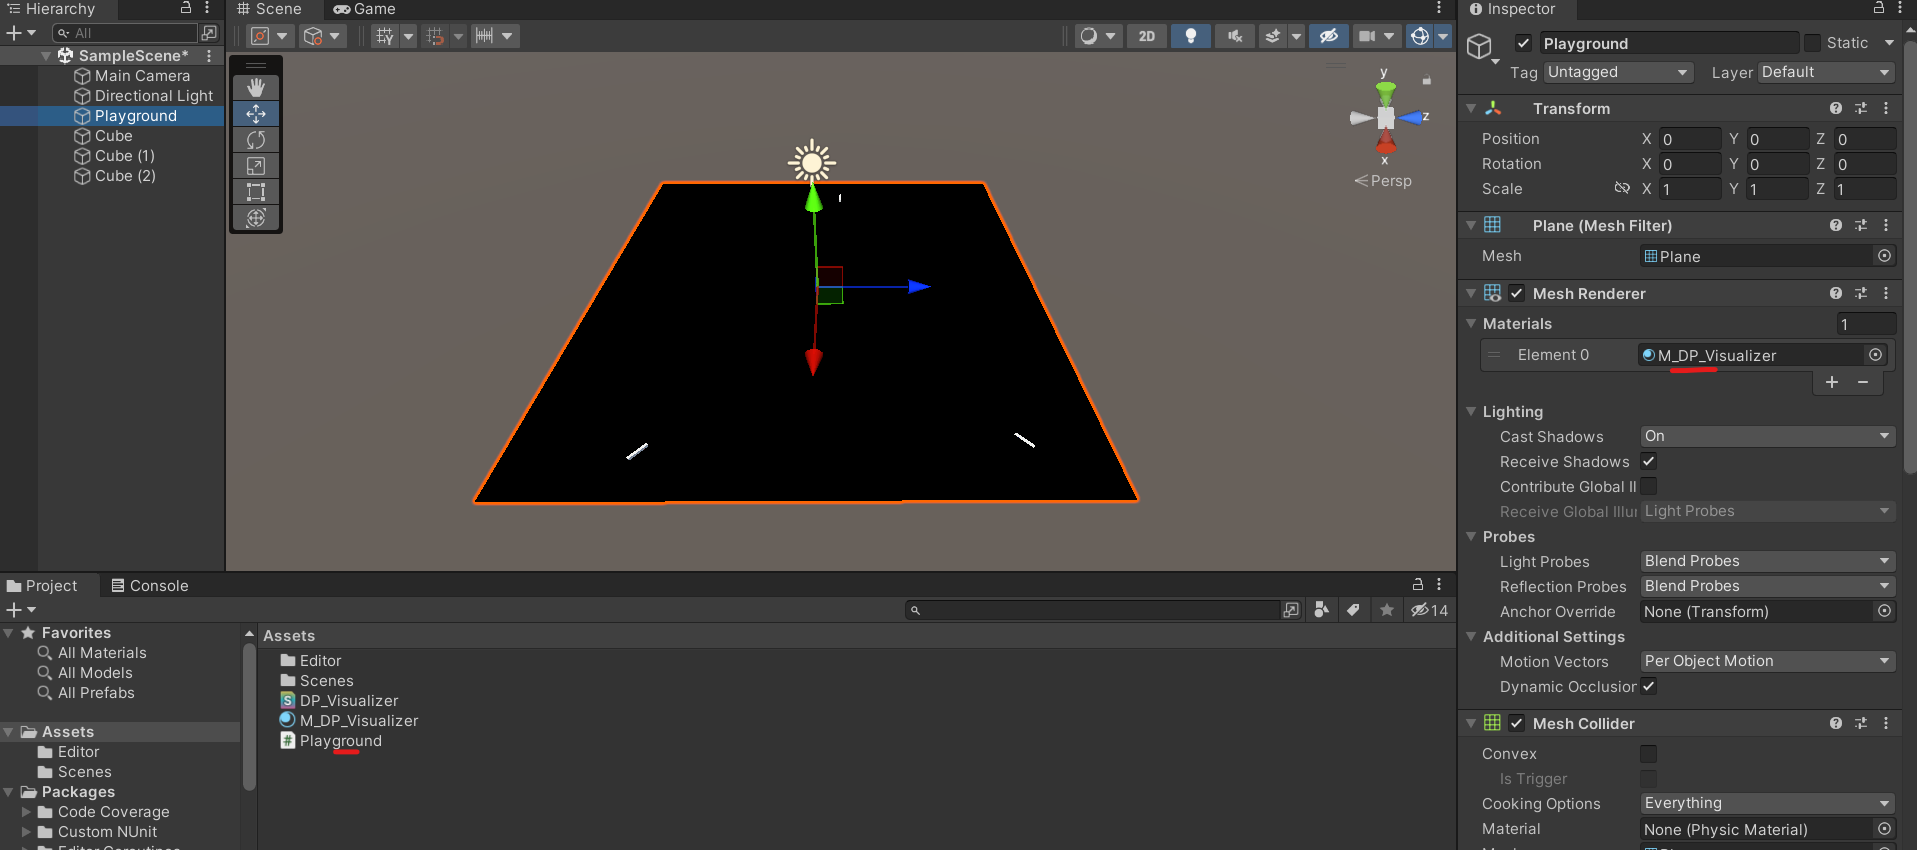
- Create a new unity scene with a plane(I named it playground) at position: (0, 0, 0) and rotation: (0, 0, 0)
- Create 3 cubes and set the scale to (0.05, 0.05, 0.3). These will serve as the point of origin for the lights to visualize dot products.
- A C# script named Playground.cs. This will be attached to the plane we create in the first step
- (Optional) An editor script for Playground.cs if you want changes to be reflected without running the game.
- An unlit shader named DP_Visualizer(Right click -> Create -> Shader -> Unlit Shader). Clear if it has any code and just have bare minimum to not throw an error and just return a black color in it’s fragment function.
- Create a material and attach the shader created in the step above.
- Attach this material to the plane created in step-1.
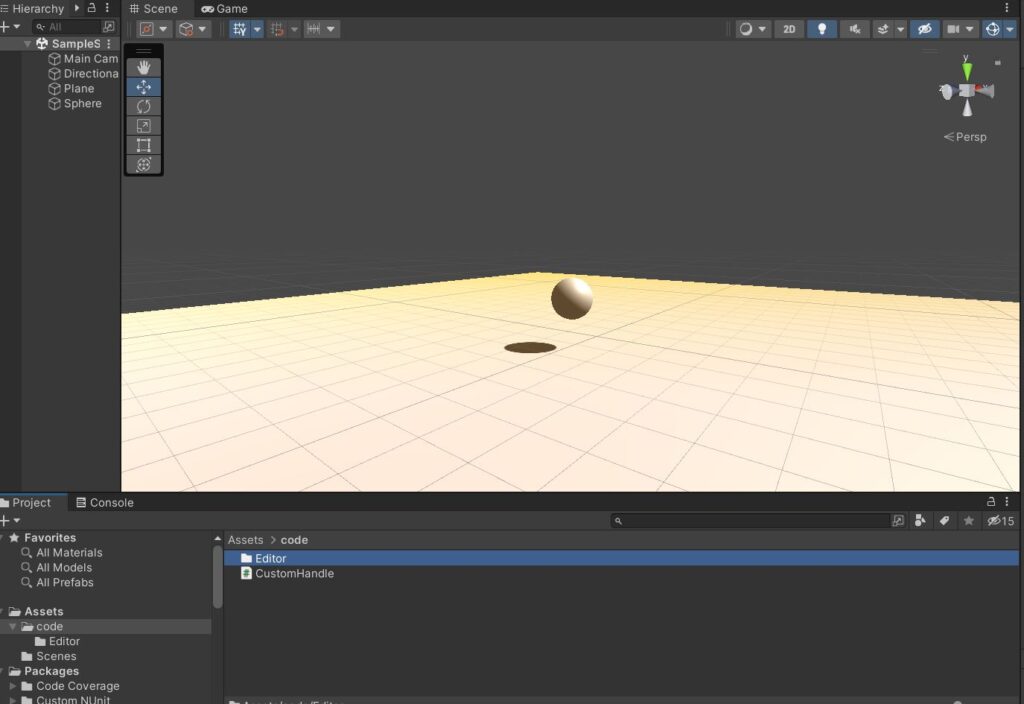
The image below will give an overview of my setup.
Let’s start coding!
In Playground.cs, we expose following variables:
- GameObjects: This is to hold the 3 cubes that we have in the scene.
- Color: The same number of colors as exposed game objects. This will determine the color of the positive dop product region.
- Distance: This determines the distance of the colored conical shape
- Angle: This is the actual angle we use to calculate the dot product.
We also need to keep track of the local position and orientation of the Cube GameObjects to send them to the shader.
We keep track of local positions so that everything is relative to the point of view of the plane.
We send the updated values to the shader in the Update() function.
The entire code for Playgound.cs is as follows:
//Playground.cs
using System.Collections;
using System.Collections.Generic;
using UnityEngine;

public class Playground : MonoBehaviour
{
    [SerializeField]
    public GameObject[] m_gameObjects = new GameObject[3];
    [SerializeField]
    public Vector4[] m_colors = new Vector4[3];
    [SerializeField]
    public float m_Distance = 1;
    [SerializeField]
    public float m_Angle = 10;


    [HideInInspector]
    public Vector4[] m_localPositions = new Vector4[3];
    [HideInInspector]
    public Vector4[] m_directions = new Vector4[3];


    MeshRenderer m_MeshRenderer;
    public void Update()
    {
        UpdateShaderValues();
    }

    public void UpdateShaderValues()
    {
        m_MeshRenderer = GetComponent<MeshRenderer>();
        for (int i = 0; i < 3; i++)
        {
            Vector3 pos = m_gameObjects[i].transform.position;
            pos.y = transform.position.y;

            m_localPositions[i] = transform.InverseTransformPoint(pos);
            m_localPositions[i].w = 0;
            m_directions[i] = transform.InverseTransformDirection(m_gameObjects[i].transform.forward);
            m_directions[i].w = 0;
        }
        m_MeshRenderer.sharedMaterial.SetVectorArray("_LocalPositions", m_localPositions);
        m_MeshRenderer.sharedMaterial.SetVectorArray("_Directions", m_directions);
        m_MeshRenderer.sharedMaterial.SetVectorArray("_Colors", m_colors);
        m_MeshRenderer.sharedMaterial.SetFloat("_Distance", m_Distance);
        m_MeshRenderer.sharedMaterial.SetFloat("_Angle", m_Angle);

        m_MeshRenderer.sharedMaterial.SetVector("_ObjScale", transform.localScale);
    }

}
The next part is optional, but will be very helpful if you want to check the results without playing the game every time. Create a PlaygroundEditor.cs script and put it inside the “editor” folder in you unity editor.
When our plane’s InspectorGUI updates, we force update the shader values.
//PlaygroundEditor.cs
using System.Collections;
using System.Collections.Generic;
using UnityEditor;
using UnityEngine;

[CustomEditor(typeof(Playground))]
public class PlaygroundEditor : Editor
{
    Playground m_playground;

    public override void OnInspectorGUI()
    {
        base.OnInspectorGUI();
        m_playground = ((Playground)target);
        m_playground.UpdateShaderValues();
    }
}
Time To Shade!!
This is where the whole thing comes together. Let’s first set up the parameters that will be passed form our C# script. They are the following:
float4 _LocalPositions[3]; // Local positions of cubes wrt Plane
float4 _Directions[3]; // Forward Direction of cubes in scene
float4 _Colors[3]; // Colors assigned to cubes
float4 _ObjScale; // Scale of plane to account for skewing
float _Distance; // How far to check
float _Angle; // Represents valid region that should be colored
In v2f struct, we keep track of the vertex’s local position, which we will use to compare against the local position of the Cubes in the scene.
Shader "Unlit/DP_Visualizer"
{
    Properties
    {
        _MainTex ("Texture", 2D) = "white" {}
    }
    SubShader
    {
        Tags { "RenderType"="Opaque" }
        LOD 100

        Pass
        {
            CGPROGRAM
            #pragma vertex vert
            #pragma fragment frag

            #include "UnityCG.cginc"

            struct appdata
            {
                float4 vertex : POSITION;
                float2 uv : TEXCOORD0;
            };

            struct v2f
            {
                float2 uv : TEXCOORD0;
                float4 vertex : SV_POSITION;
                float4 localPos : TEXCOORD1;
            };

            sampler2D _MainTex;
            float4 _MainTex_ST;

            float4 _LocalPositions[3];
            float4 _Directions[3];
            float4 _Colors[3];
            float4 _ObjScale;

            float _Distance;
            float _Angle;

            ENDCG
        }
    }
}
We finally setup the vertex and fragment shaders as follows:
Vertex shader is nothing special. Only thing we do different is to send position of vertex inside the output structure.
Fragment shader is where the core of the logic happens:
- For each of the three cubes we’ve set up in scene, we get the vector from cube’s local position to pixel position (input.localpos).
We then multiply that with _ObjScale to deter the affects of any scale on our plane. - From the vector we calculated above, we calculate Dot Product with the forward vector of the respective cubes.
- To color the valid region of the dot product, we compare the result with the angle we passed from the C# script. If the Dot Product of the vectors is greater than cosine of angle provided, we color the region.
- To have the colors interact with each other, we add to the existing color of the fragment, instead of replacing it.
- Finally, to control the reach of the drawing area, we use the following instruction:
smoothstep(_Distance, 0.0, length(diff))
 v2f vert (appdata v)
 {
      v2f o;
      o.vertex = UnityObjectToClipPos(v.vertex);
      o.uv = TRANSFORM_TEX(v.uv, _MainTex);
      o.localPos = float4(v.vertex.xyz, 0.0);
      return o;
}

fixed4 frag (v2f input) : SV_Target
{
    fixed4 finalCol = 0.f;

    for (int i = 0; i < 3; i++)
    {
         float3 diff = input.localPos - _LocalPositions[i];
         diff *= _ObjScale;

         //DOT Product visualization
         float dp = dot(normalize(diff), _Directions[i]);
         float cosVal = cos(radians(_Angle));
         if (dp >= cosVal)
         {
               finalCol += _Colors[i] * smoothstep(_Distance, 0.0, length(diff));
         }
    }
     fixed4 col = finalCol;
     return col;
}
With this, you should be able to tweak values in inspector and have results something similar to this:

You can go a little further and smooth the edges of the cone too with following code and have the results look like the one in the first picture of the post:
finalCol += _Colors[i] * smoothstep(_Distance, 0.0, length(diff)) * smoothstep(cosVal, 1.0f, dp) * 3;
That is all for this post on dot product visualization. Please drop a comment if you have any feedback.
Hope you’ve learnt something and do visit again! 🙂
